Private Gitlab Repository 구성하기
Gitlab-CE 설치하기
git repository로 public 으로 사용할 수 있는 대표적인 것 중 하나가 github와 gitlab입니다.
gitlab은 Gitlab-CE 로 기업의 Private 환경에 git 소스 Repository로 구성이 가능합니다. 상용 솔루션으로 Bitbucket도 많이 사용하지만 오픈소스 무료 솔루션으로 구성할 수도 있습니다.
Step 1 : Gitlab을 위한 Pre-requisites package 설치
gitalb-ce 를 설치하기 위한 사전 필수 패키지를 설치합니다.
sudo yum -y install wget bash-completion git policycoreutils-python
Step 2 : Postfix 설치 및 설정
Gitlab system 에서 Notification 을 수행하기 위해 Postfix 를 설치하고 간단하게 설정합
sudo yum -y install postfix
/etc/postfix/main.cf 에서 아래의 내용을 수정합니다.
myhostname = gitlab.example.com
mydomain = example.com
myorigin = $myhostname
inet_interfaces = all
mydestination = $myhostname, localhost.$mydomain, localhost, $mydomain
relay_domains = $mydestination

vi /etc/postfix/main.cf
Step 3 : Gitlab-CE 설치
gitlab repo 정보를 download 받습니다.
curl -sS https://packages.gitlab.com/install/repositories/gitlab/gitlab-ce/script.rpm.sh | sudo bash

EXTERNAL_URL="https://gitlab.example.com" yum install -y gitlab-ce

# gitalb 실행 상태 확인
gitlab status
Step 4 : private domain 을 hosts 파일에 등록
브라우저에서 gitlab.example.com으로 접속하기 위해 laptop의 hosts에 gitlab.example.com domain을 등록하고 브라우저에서 접속합니다.
Step 5 : root 사용자 비밀번호 초괴화
gitlab console로 접속하기 위해 다음의 명령어를 수행합니다.
gitlab-rails console -e production
첫번째 아이디값을 user에 넣는 명령어이다. #<User id:1 @root> 라는 응답이 올것이다. 관리자계정은 root 입니다.
user = User.where(id: 1).first

# 수행결과
--------------------------------------------------------------------------------
 Ruby:         ruby 2.7.7p221 (2022-11-24 revision 168ec2b1e5) [x86_64-linux]
 GitLab:       15.8.1 (383efe57adf) FOSS
 GitLab Shell: 14.15.0
 PostgreSQL:   13.8
------------------------------------------------------------[ booted in 36.14s ]
Loading production environment (Rails 6.1.6.1)
irb(main):001:0> user = User.where(id: 1).first

# 수행결과
=> #<User id:1 @root>
irb(main):011:0> user.password='Passw0rd!'
=> "Passw0rd!과
irb(main):012:0> user.password_confirmation='Passw0rd!'

=> "Passw0rd!"
irb(main):013:0> user.save
Step 6 : gitlab-ce 로그인
위에서 설정한 root 사용자의 credentials 정보로 로그인합니다.

gitab에 로그인 후 첫 화면은 다음과 같습니다.

Step 7 : New Account 생성
gitlab 에 사용자를 추가하기 위해 admin을 선택합니다.
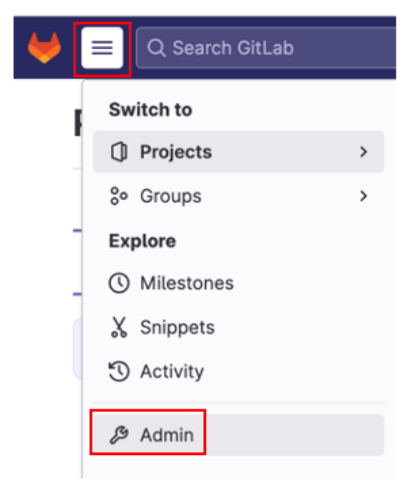
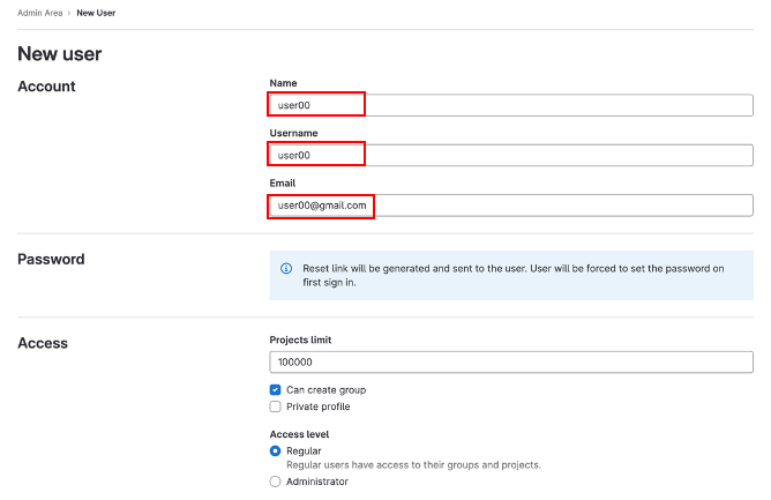
gitlab 에 사용자를 추가합니다.

gitlab 에 사용자 정보를 입력하고 저장버튼을 클릭합니다.
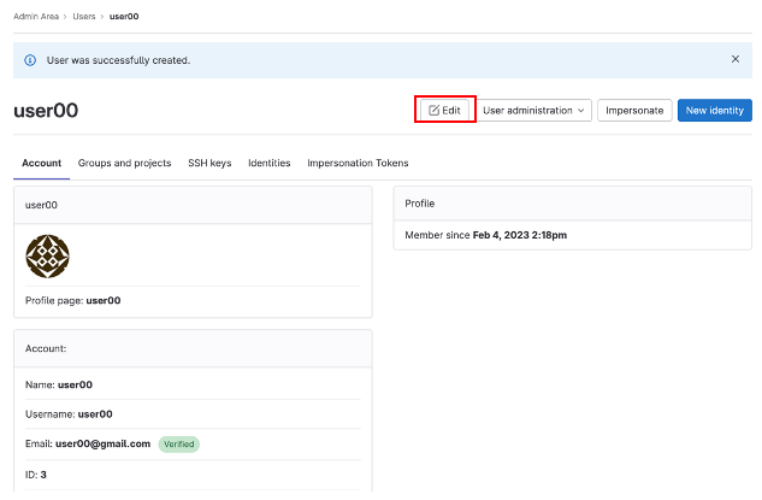
gitlab 에 새로 생성한 사용자 정보를 확인하고, 초기 비밀번호를 설정하기 위해 Edit 버튼을 클릭합니다.
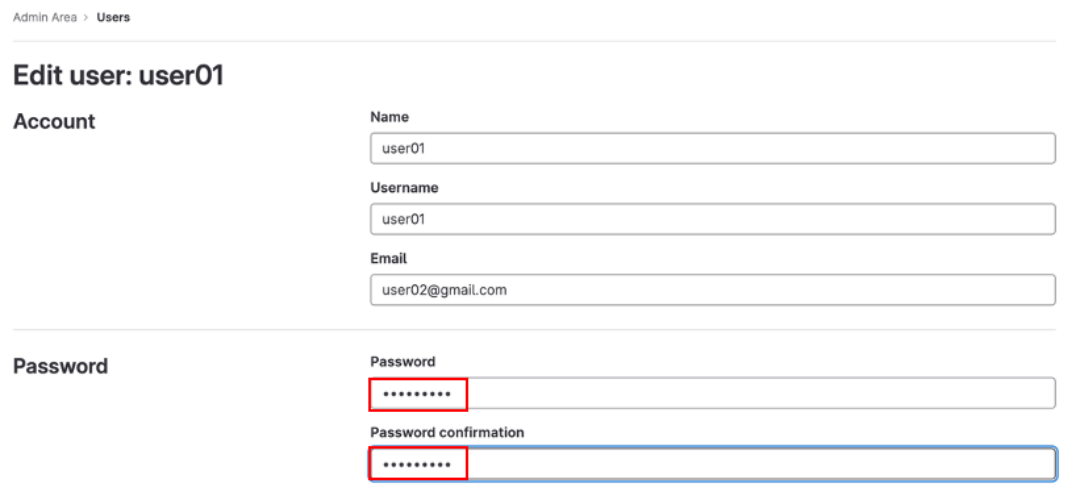
gitlab 에 새로 생성한 사용자 초기 임시 비밀번호를 설정하고 저장합니다.
Step 8 : 신규 사용자 로그인
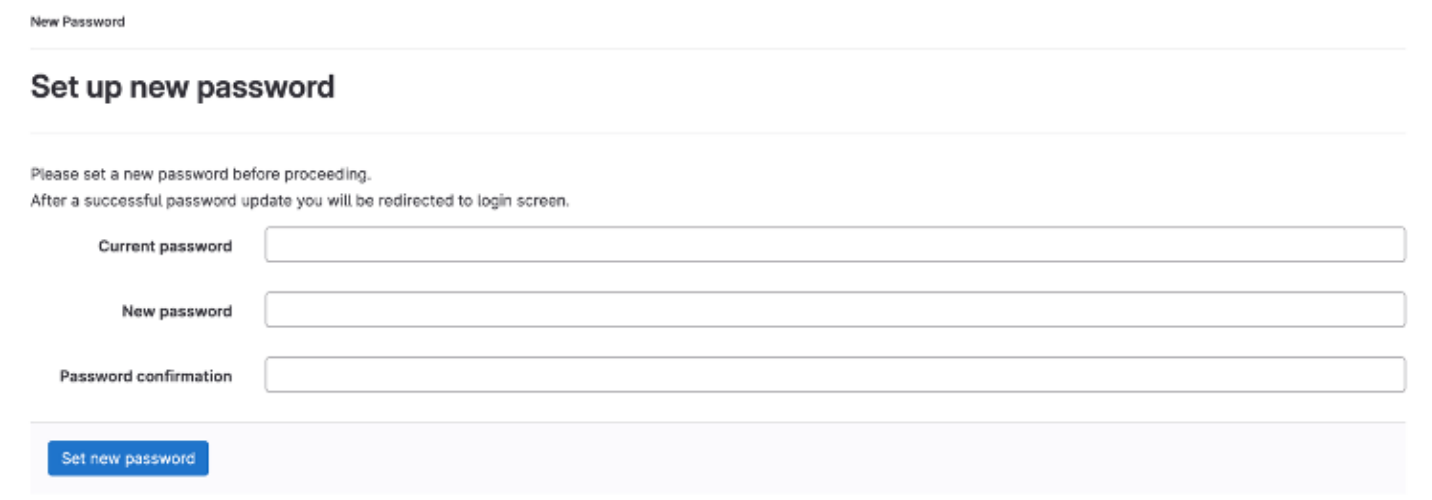
gitlab을 root사용자를 logout하고, 새로 생성한 user00로 로그인하여, 비밀번호를 설정합니다.
Step 9 : 신규 project 생성
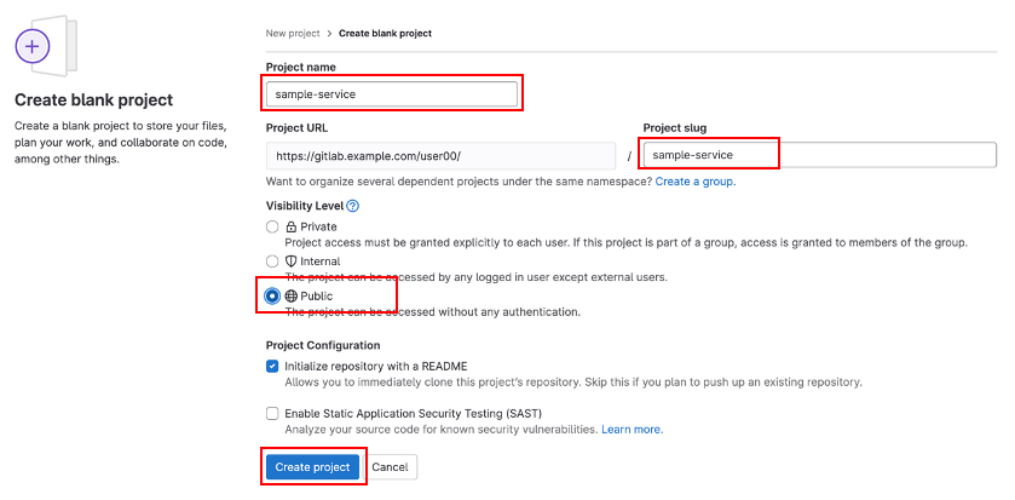
gitlab을 smaple-service project를 생성합니다.
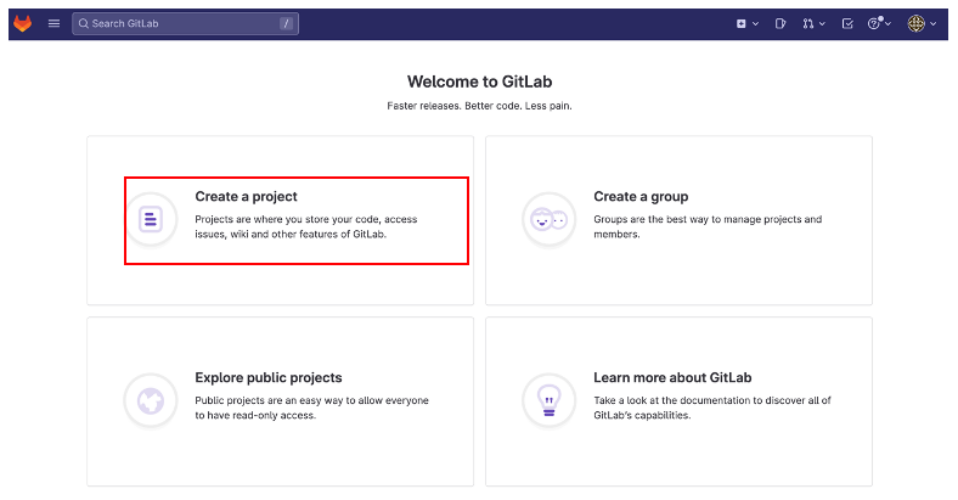
gitlab을 smaple-service project를 생성합니다.
댓글남기기